Hooping and Stabilizing Performance Knits
Blog Archive from Designs in Machine Embroidery Volume 105: July/August 2017
Performance knits can be very tricky to stabilize and hoop for machine embroidery. Through the years, I have embroidered hundreds of shirts made of this four-way stretch fabric. The performance fabric is 100% polyester and has wicking capabilities. “Wicking” is a term used to define fabric that pulls or wicks the moisture from the body. Performance fabric is light weight, stretchy and very comfortable to wear.
When stabilizing a performance fabric garment, it is important not to “over stretch” the fabric. In general, you want the fabric and stabilizer to be taut like a tambourine. If you over stretch the fabric during hooping, the embroidery will appear puckered when worn.
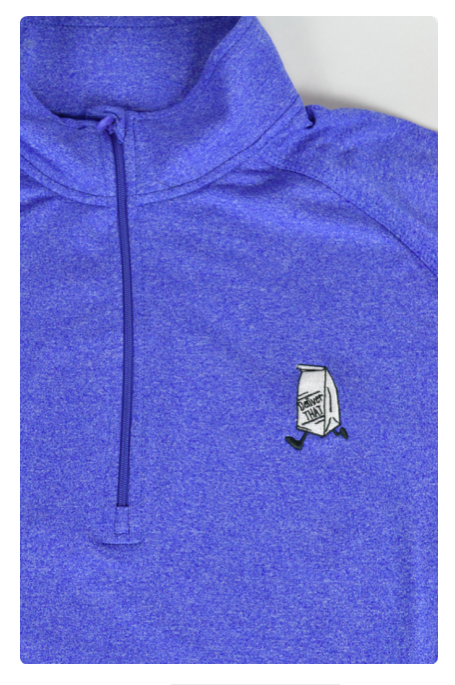
Take into consideration the size and stitch count of an embroidery design. Left chest logos and simple sleeve personalization are the best choices for stitching on performance fabric. Large center chest or full back designs are not recommended for this fabric.
Cut away stabilizer is the best solution for embroidery on performance knits. Use a polymesh or no-show mesh cut away stabilizer hooped with the garment.
Polymesh stabilizer is available in three colors: black, white and natural. The natural color stabilizer is ideal to use on white performance fabric. I do not recommend fusible polymesh for stabilizing this fabric. You can easily damage the fabric when applying heat and adhesive to the delicate fabric.
Do not “float” performance fabric; this fabric must be completely hooped if you want the garment to look professionally embroidered. If the embroidery design is a bit dense, use two pieces of stabilizer layered together in the hoop.
“‘When in doubt, cut it out.’ Something to remember when embroidering on fabric that you might not know the fabric content. ”
Choose the embroidery design and select the appropriate size hoop. As with all embroidery,
use the smallest hoop to fit the design. Even if an embroidery design is 4.02", decrease the size a fraction to fit in a 4" x 4" hoop. The stabilization is much better in a smaller hoop.
Button all buttons and close any zippers when determining the placement for the embroidery. Use a placement template such as the Embroiderer’s Helper to properly position the design on the garment.

Cover your work surface with rubber mesh to keep the hoop from sliding. Lay the garment on the hoop’s outer ring centering the target sticker. Gently adjust the fabric and stabilizer to remove wrinkles or puckers when the inner ring is inserted. Do not over stretch or tug on the fabric after it is placed inside the hoop.
Turn over the hoop and double check if any excess fabric is caught underneath the hoop. Notice how taut the fabric is?
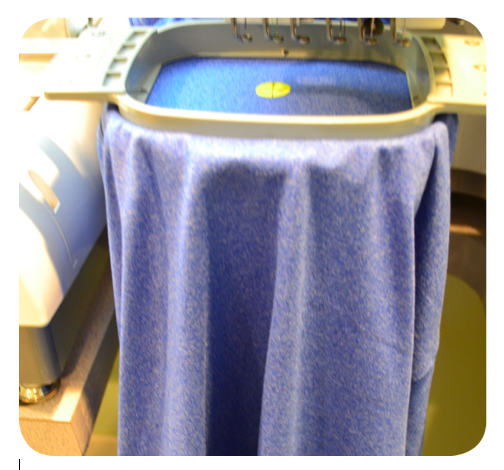


Keep the target sticker in place until the machine’s needle is aligned with the cross hair on the target sticker. Remove the target sticker and add a piece of water soluble stabilizer on top of the fabric, hold it in place with a basting file or tape. Insert the hoop into the frame through the neckline of the garment. Let the fabric hang down in front of the machine as shown below.
Stitch the design and remove the hoop from the machine. Carefully remove the garment from the hoop and trim the excess stabilizer from the back, holding the bulk of the fabric underneath with your hand. Always leave 1 ⁄ 4" of stabilizer around the perimeter of design.